Rip It Up and Start Again: Your No-BS Guide to Turning Thrifted Basics Into Wearable Dissent
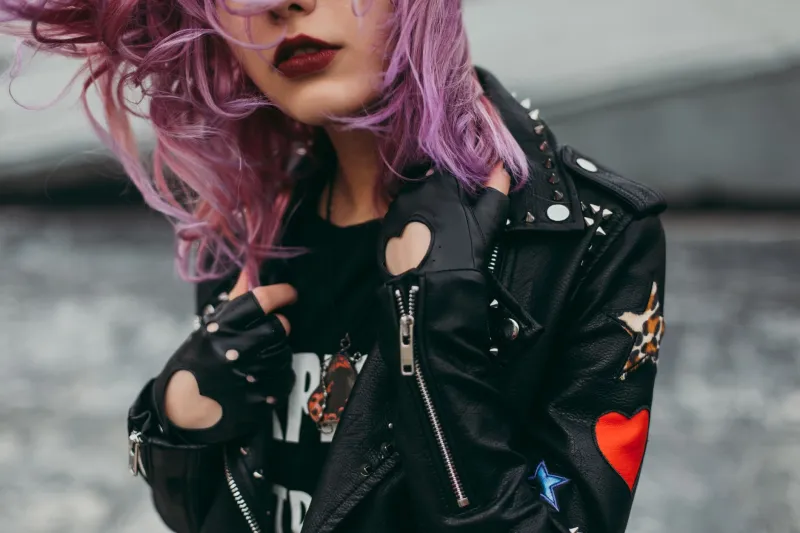
There's a certain kind of power in putting something on your body that nobody sold you whole. A jacket that started as a $4 Goodwill find and ended up covered in hand-stitched imagery, iron-on patches, and a bleach-splattered back panel tells a story that no brand campaign ever could. It's yours. Completely, unapologetically yours.
DIY clothing customization has roots that run deep — from the punk kids safety-pinning ripped denim in 1977 London to the zine-era grunge aesthetic of early-'90s Seattle, from the Chicano lowrider scene's embroidered silkwork to the protest gear hand-stenciled outside abortion clinics in the 2000s. The act of modifying what you wear has always been tied to something bigger than fashion. It's about refusing to be dressed by a system that doesn't represent you.
We talked to a handful of independent artists and DIY lifers about how they do it — and pulled together a starter guide so you can get to work.
Why Customization Is More Than a Trend
Let's be clear: this isn't about making something "cute" for TikTok (though if that's a side effect, fine). Customizing your basics is a way to opt out — of fast fashion's churn, of logo culture's demand that you advertise someone else's brand, of the idea that your wardrobe should look like everyone else's because an algorithm decided so.
Maya R., a textile artist and activist based in Philadelphia, puts it plainly: "When I started embroidering political imagery onto my own clothes, I wasn't thinking about aesthetics. I was angry. I needed somewhere to put it. The fact that it looked good was almost secondary."
That dual function — emotional expression and visual communication — is exactly what makes DIY customization resonate right now. In a moment when a lot of people feel like they have very little control over very large things, making something with your hands and wearing it out into the world is a small but real assertion of agency.
Start Here: The Four Core Techniques
1. Patches — The Gateway Drug
If you've never customized anything before, patches are where you start. Iron-on versions are the most accessible — you can find them at craft stores, independent vendors on Etsy, or from small artists selling at flea markets and zine fests. But sewing patches on by hand or machine is more durable and gives you more control over placement.
What you need: Patches (obviously), a needle and thread or a sewing machine, scissors, and optionally a seam ripper if you're repositioning.
Pro tip from the field: Layer them. Don't just slap one patch on the chest and call it done. Build a composition. Think about negative space. Denim jackets and canvas tote bags are the best canvases to start with because they're sturdy and forgiving.
Jordan M., who runs a small custom jacket operation out of Austin, Texas, says the trick is intentionality: "People can tell when something was thrown together versus when someone actually thought about what they were saying. Even if it's chaotic on purpose, that chaos should mean something."
2. Embroidery — Slow, Deliberate, Permanent
Embroidery has had a massive resurgence over the last few years, and for good reason. It's meditative, it's highly personal, and it creates something that will literally outlast the garment itself if done right. You can embroider text, imagery, abstract shapes — anything.
What you need: Embroidery hoop, embroidery floss (DMC is the standard), a needle with a large eye, a water-soluble marking pen to sketch your design, and fabric stabilizer if you're working on something stretchy like a jersey tee.
Where to learn: YouTube is genuinely excellent for this. Search for basic stitch tutorials — satin stitch, backstitch, and French knots will get you 80% of the way there. From there, it's just practice.
Maya's advice: "Start small. Do a word on the collar of a shirt. Don't try to embroider a full portrait on the back of a jacket as your first project. You'll hate yourself."
3. Screen Printing — Scale It Up
If you want to make multiples — for yourself, for friends, for a protest, for a small run of merch — screen printing is the move. It has a higher upfront cost and a steeper learning curve, but the payoff is real.
Basic setup: You'll need a screen (pre-made screens are available at art supply stores), photo emulsion, a squeegee, fabric ink, and a light source to expose your design. Speedball makes a beginner kit that runs around $40–60 and covers most of what you need.
The process in brief: Create your design in high contrast (black and white works best for beginners), expose it onto the emulsion-coated screen using UV light or direct sunlight, wash out the unexposed areas, then press ink through the screen onto your fabric.
It takes a few attempts to get clean prints, but once you do, you can run off a dozen shirts in an afternoon. That's when it stops being a hobby and starts feeling like something else entirely.
4. Fabric Modification — Destruction as Design
Bleach, scissors, sandpaper, a seam ripper, a cheese grater — these are all legitimate tools. Distressing, cutting, and chemically altering fabric has a long history in countercultural fashion, and it's one of the most low-barrier ways to make something feel completely different.
Bleach techniques: Dilute bleach in a spray bottle (roughly 1 part bleach to 3 parts water) and spritz onto dark fabric for a splatter effect. Or dip the hem of a black shirt into a shallow dish of bleach solution for a gradient fade. Always do this outside or in a well-ventilated space. Rinse thoroughly afterward.
Cutting: Raw-edge hems, cut-off sleeves, asymmetrical necklines — all of these change the silhouette of a garment dramatically. Don't be precious about it. If it doesn't work, you've lost a $3 thrift store shirt.
Building a Practice, Not Just a Look
The artists we spoke to were unanimous on one thing: this stuff only gets meaningful when you commit to it as a practice rather than a one-time project. Keep a dedicated bag of supplies. Carry patches and a needle and thread with you. Work on something every week, even if it's just a few stitches.
"The more you make, the more you figure out what you actually want to say," Jordan told us. "Your early stuff might be kind of generic — a fist, a slogan you saw somewhere. But eventually you start finding your own visual language. That's when it gets interesting."
That's the real goal here. Not a finished product. A voice.
None of us came pre-assembled with a wardrobe that told our story. That's on us to build — one patch, one stitch, one bleach-splattered hem at a time.